Google Chrome access using self-signed certificate on Macos
To follow up this tutorial you require:
- Apple with Macos
- Google Chrome browser
- Firefox browser
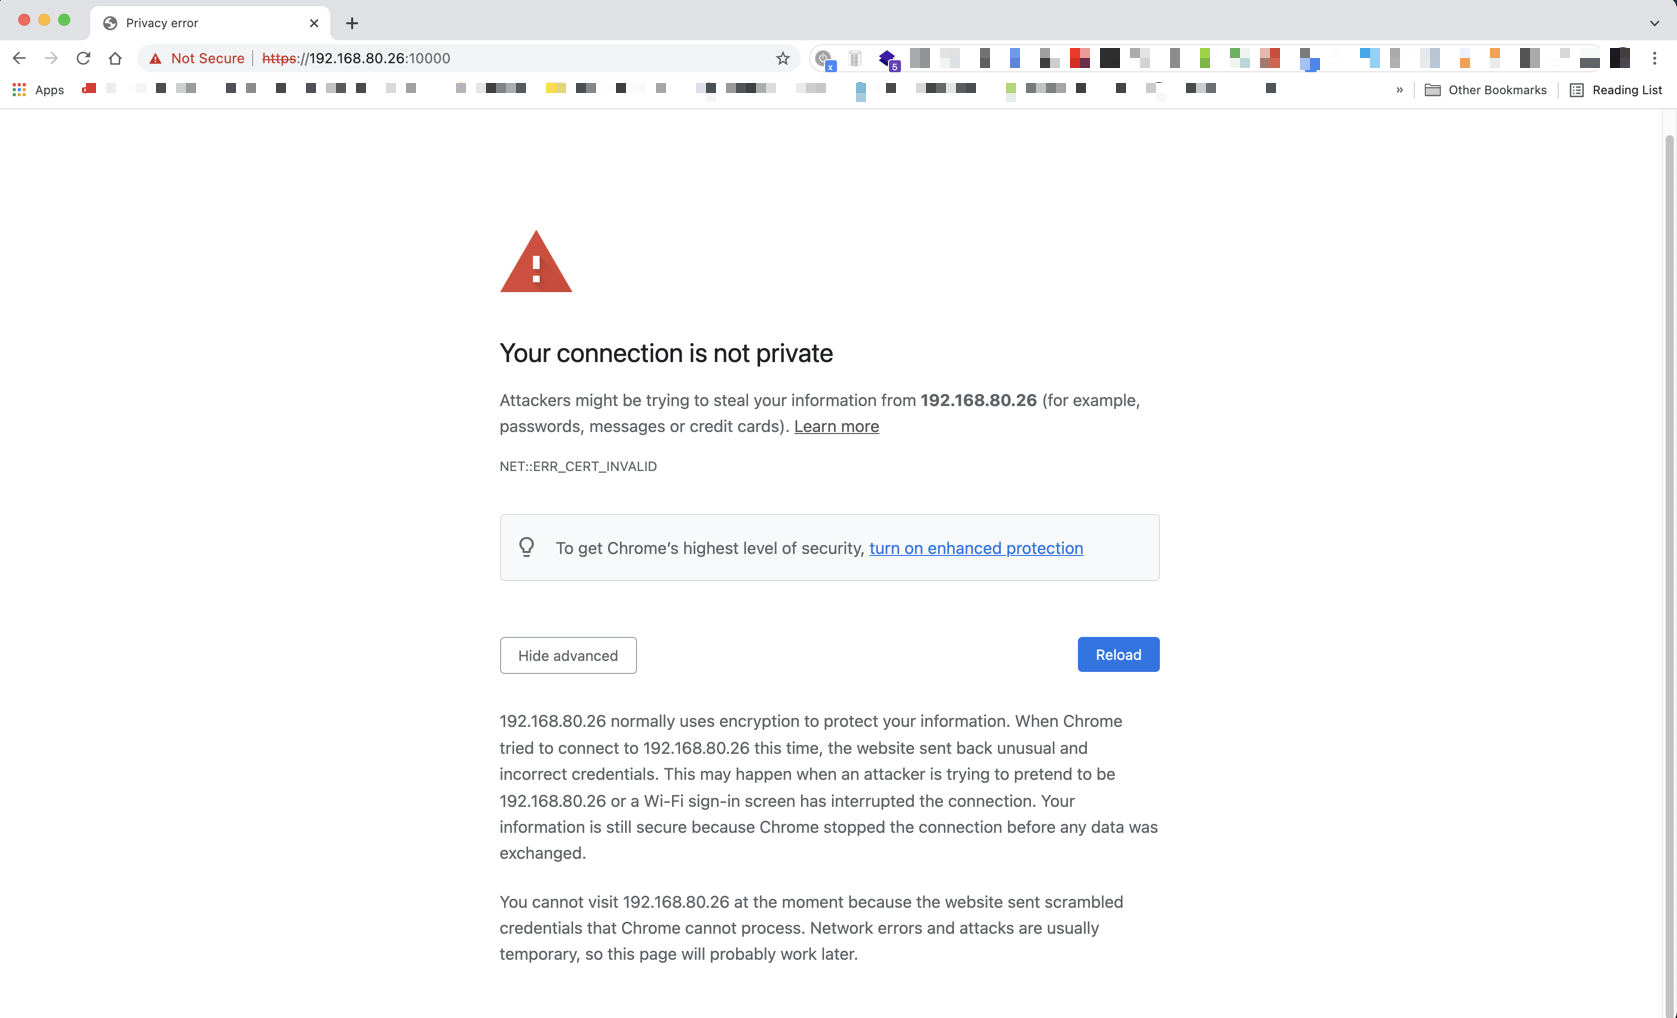
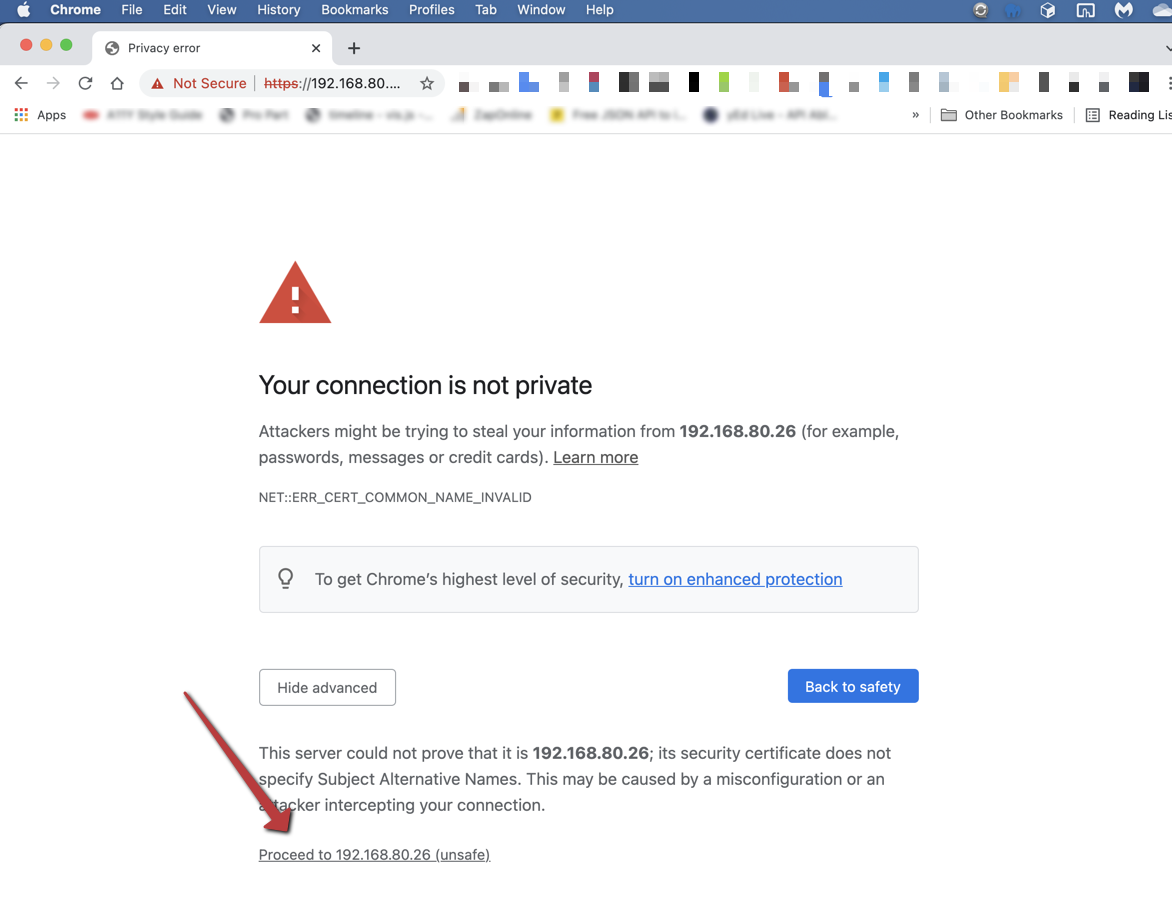
1. No access in Google Chrome
Google Chrome doesn't grant you further access while the connection is not private. In the latest versions of Google Chrome it just ends here. But keep reading.
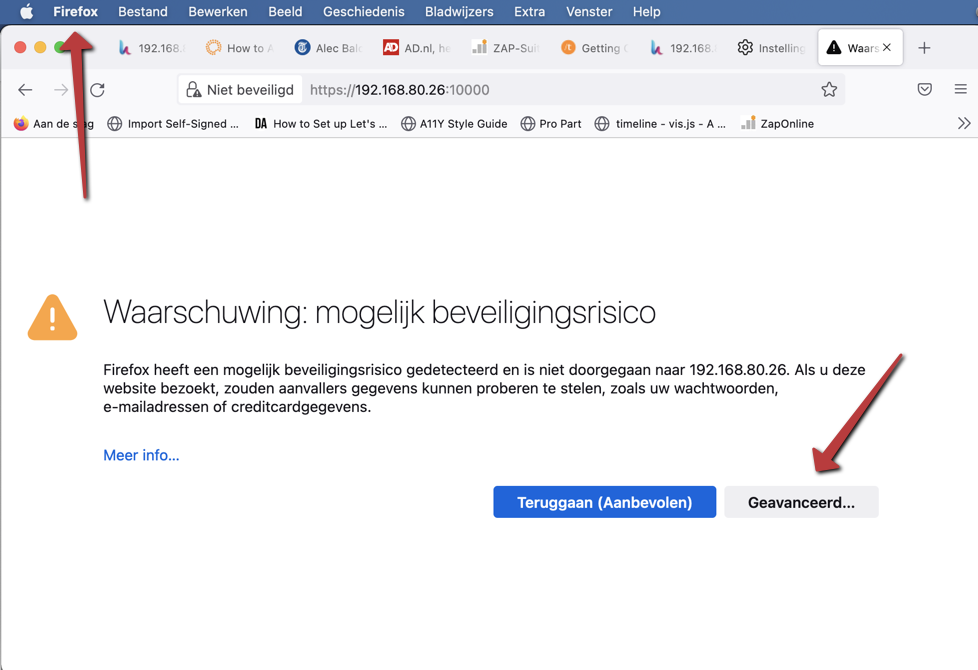
2. Prepare some things in Firefox
Put the URL you have used in Google Chrome in the Firefox browser. Now you will get a safety risk warning (shown here in Dutch). Continue by pressing "Advanced" ("Geavanceerd" in Dutch).
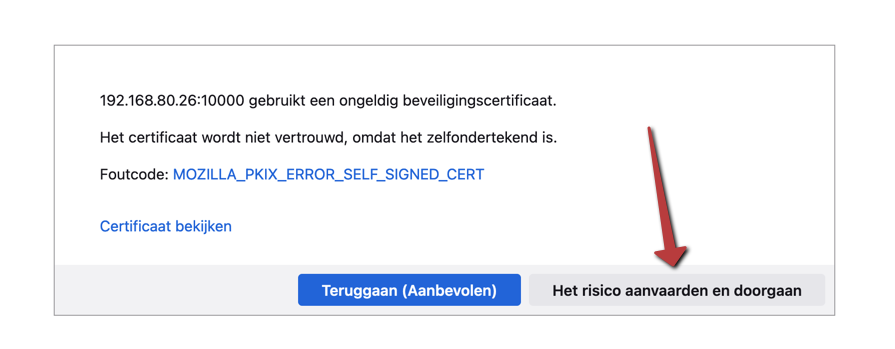
3. Accept the risk in Firefox
Now continue by pressing "Accept the risc and continue" ("Het risico aanvaarden en doorgaan" in Dutch)
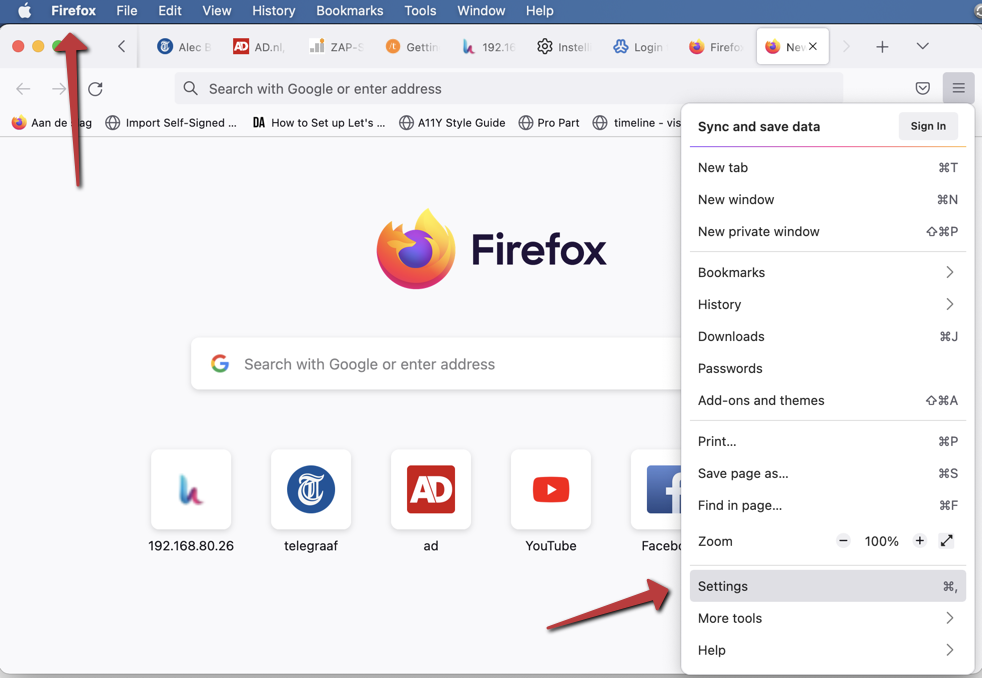
4. Goto Firefox settings
Now select "Settings" from the hamburger menu on the right. We need to save the certificate to our local harddisk.
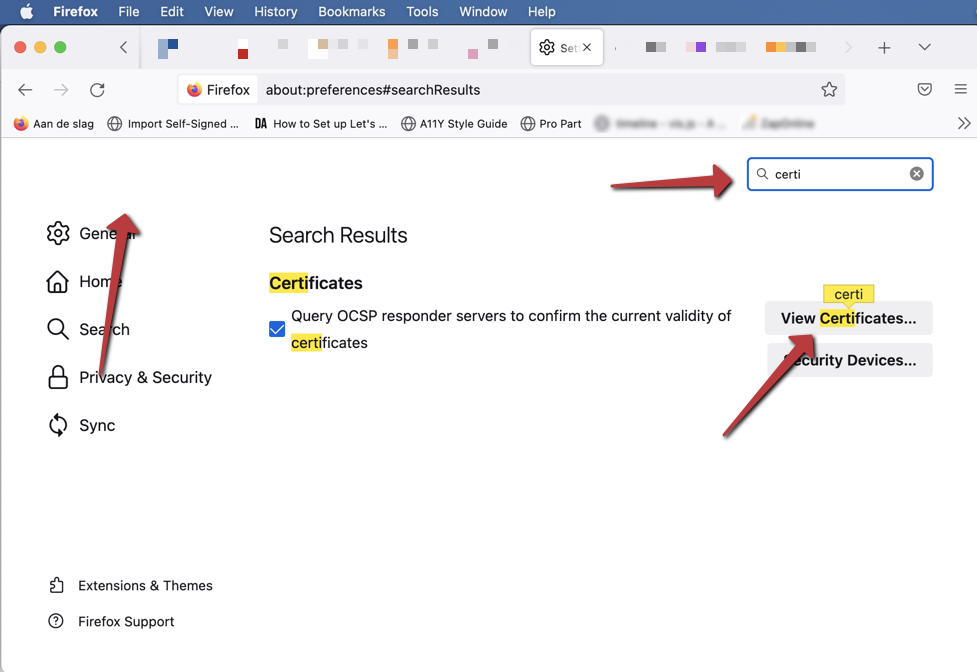
5. Find the certificate section
The easiest way is now to enter "certi" in the search field and reduce the options in the settings to the one we require. Now click on "View Certificates" to continue.
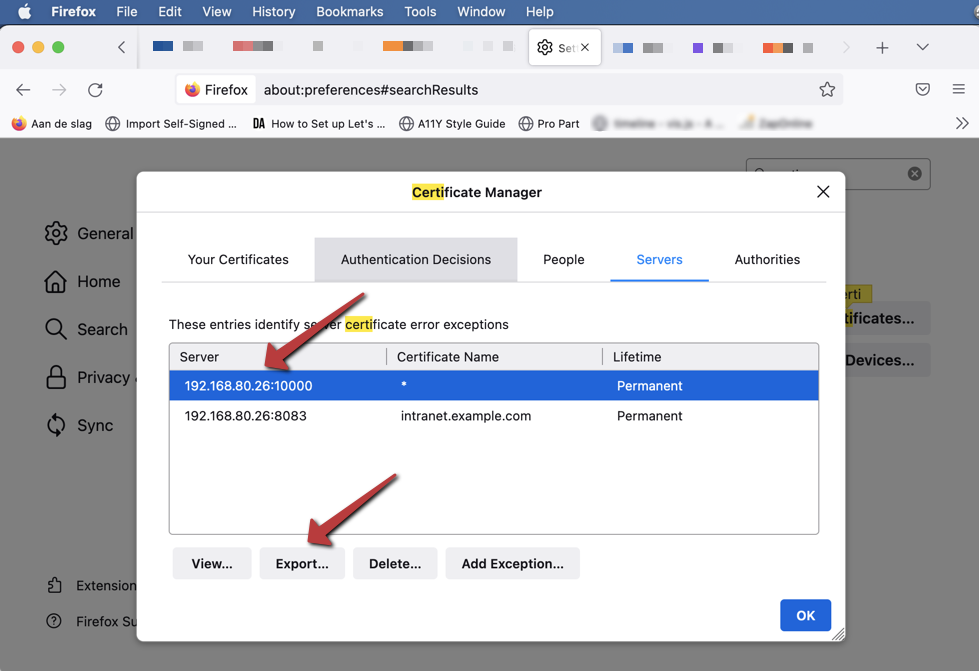
6. Find the certificate and export it
Now find the the certificate you just granted access for. You can easily recognize on the information in the "Server" column.
When you have selected it, continue by pressing "Export...".
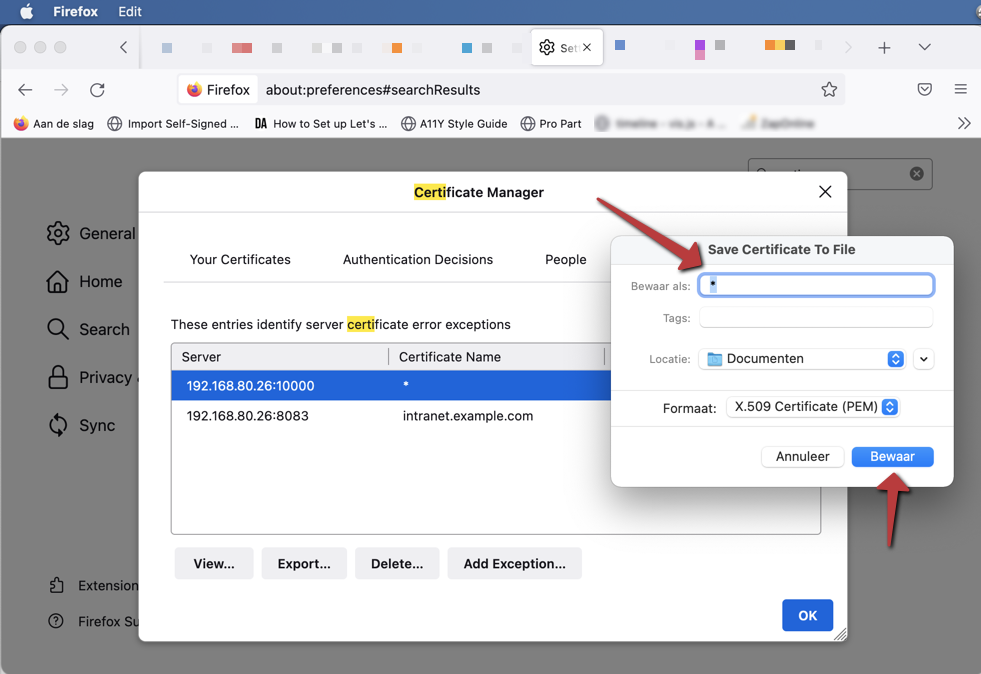
7. Save under a easy to find name
Now enter an easy to find name in the "Save Certificate to File" dialog in the field "Save as" ("Bewaar als" in Dutch).
Continue by pressing "Save" ("Bewaar" in Dutch).
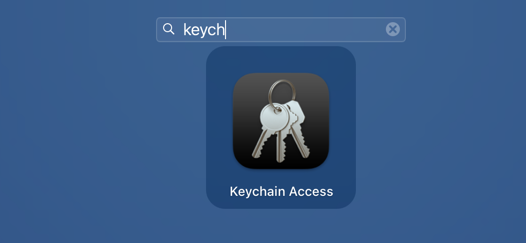
8. Open the Keychain Access Program on the Mac
Now you have to open the "Keychain Access" program on your Mac. We have to import the just saved certificate on your Mac.
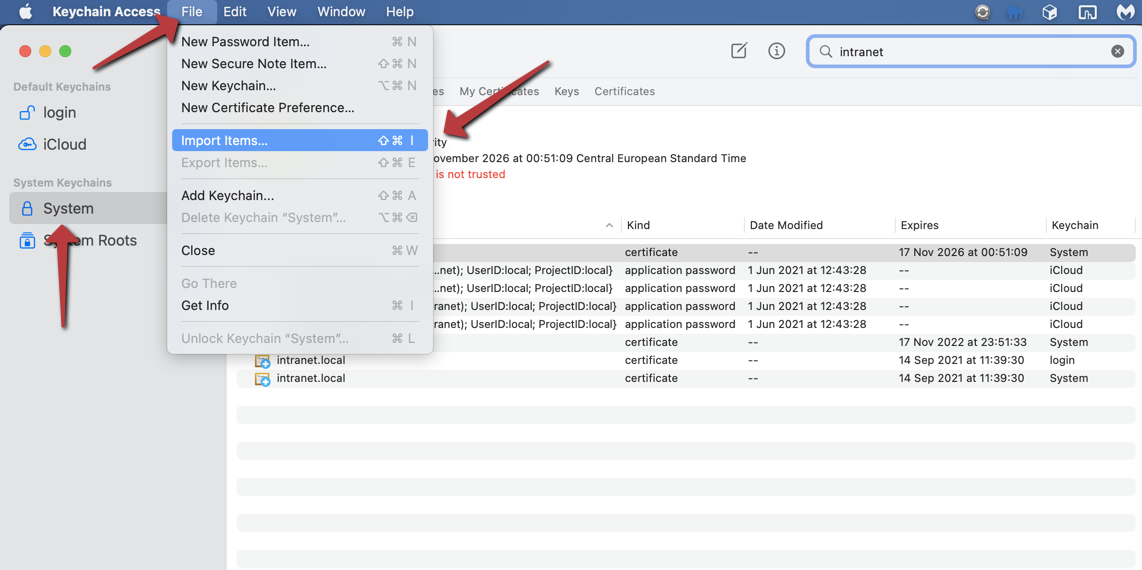
9. Import items
Now you have to select "Import Items..." from the "File" menu.
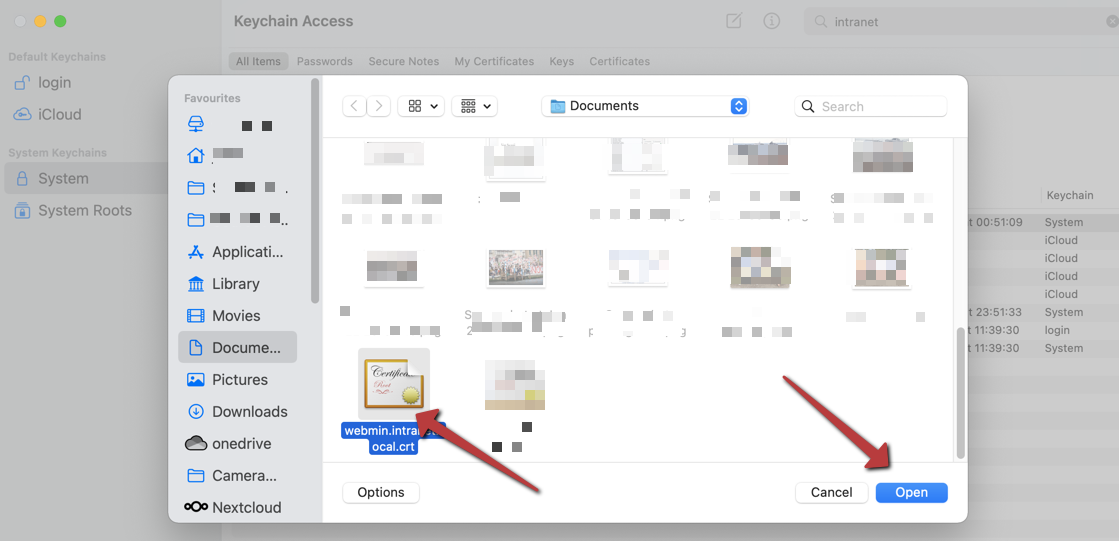
10. Import the certificate
Now select the file you have created under step 7 in Firefox. If you have taken my advise, it was saved under an easy to find name. Continue by selecting it and click on "Open".
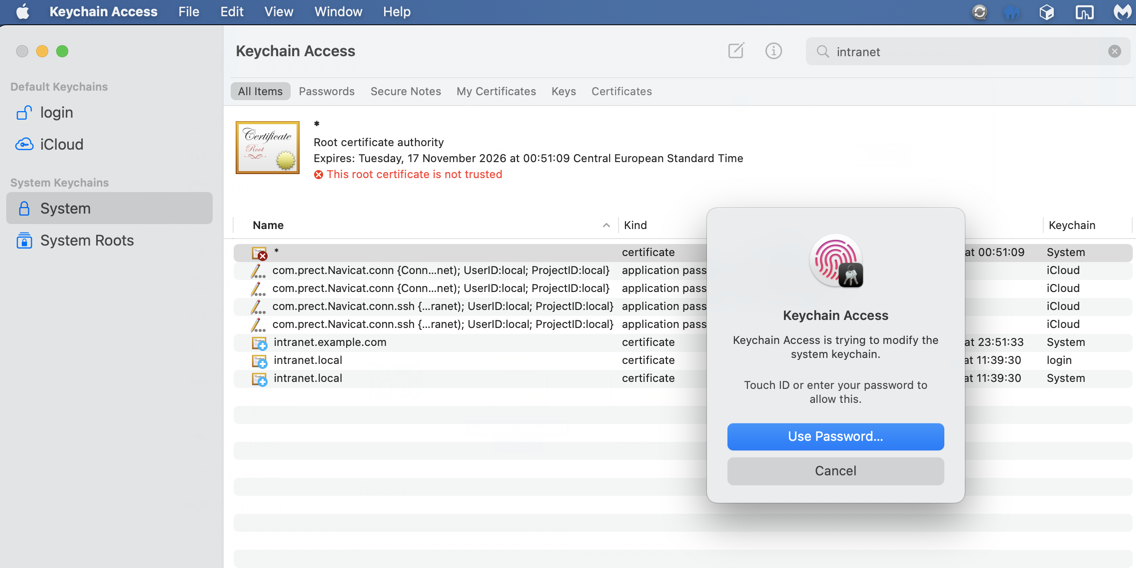
11. Confirm
You have to to confirm the import by using your password or fingerprint (when activated).
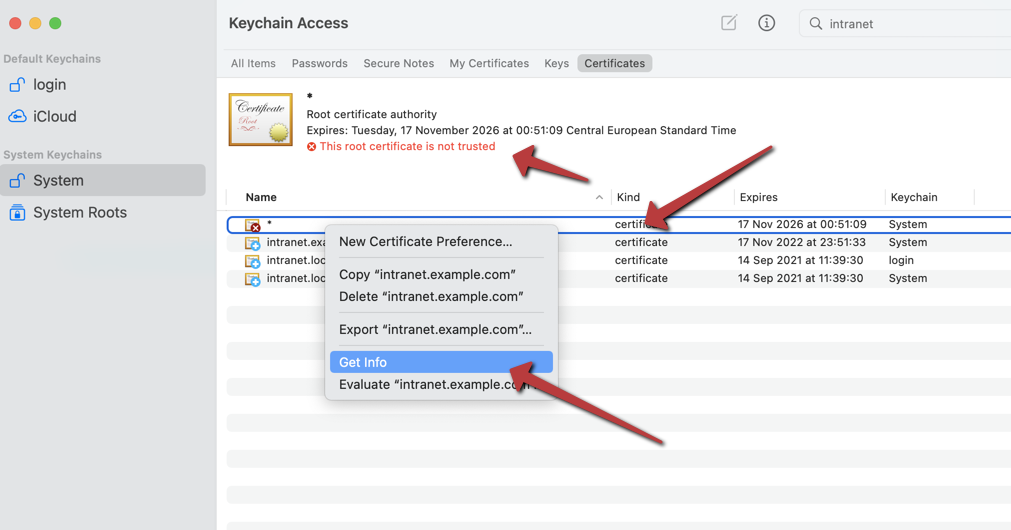
12. Get Info to grant access
Now the certificate is imported it is by default still not trusted. So click on the certificate you just have imported and with the mouse right-click select "Get Info".
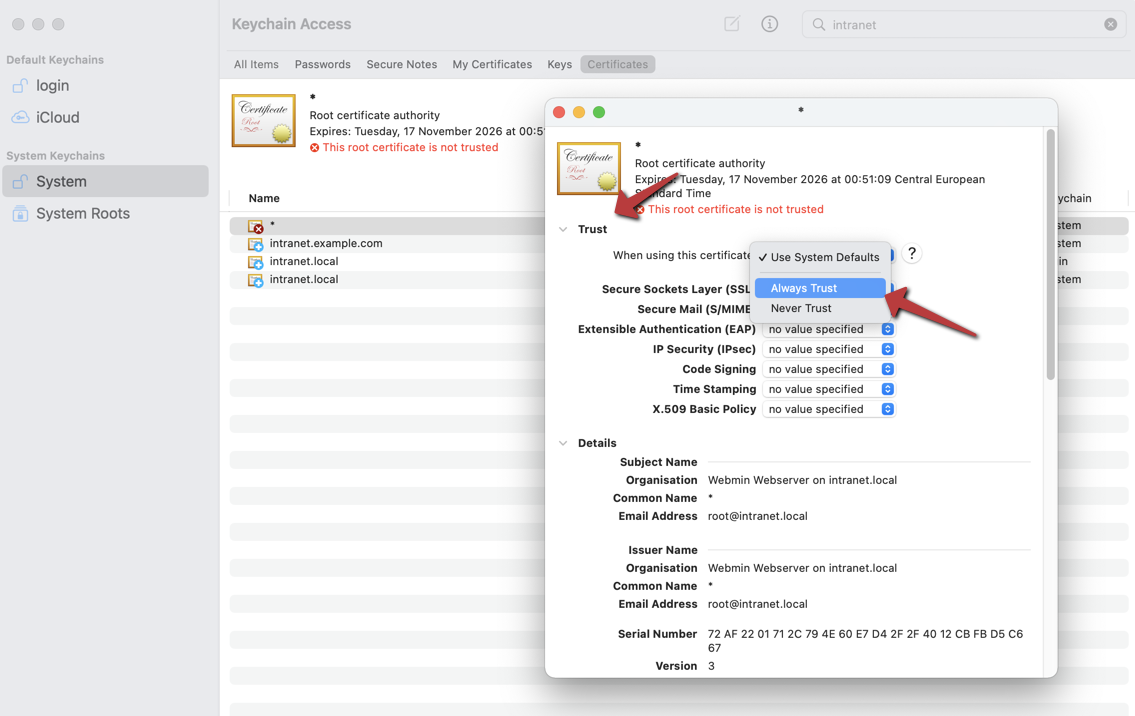
13. Change the trust
Now open the "Trust" section by clicking on it. Change the "Use System Defaults" in "Always Trust". Then close the dialog and confirm it by password or fingerprint.
14. Reload the page in Google Chrome
Now reload the page in Google Chrome and now you can override the safety warning and proceed to the page with the certificate you just have given your trust.

Johan van de Merwe
More from same category

|
|

|
|

|
|

|
|

|
|

|
|

|
|

|