How to connect to a MySQL database over a SSH tunnel with HeidiSQL
HeidiSQL a very reliable and trusted MySQL client in your Windows toolbox
HeidiSQL is a highly efficient and free database client for Windows that also functions effectively on Linux when coupled with Wine.
To establish this connection successfully, it is essential that your hosting provider supports opening an SSH connection to your webspace. This guide assumes that you have your SSH login credentials and database details readily available.
Step 1. Creating a New Connection in HeidiSQL
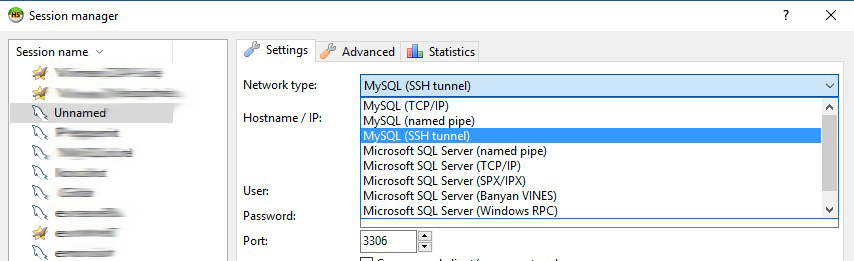
Begin by creating a new session in the session manager accessible from the "File" menu.
Choose the network type and opt for "MySQL (SSH Tunnel)".
Step 2. Configuring settings in the Settings tab
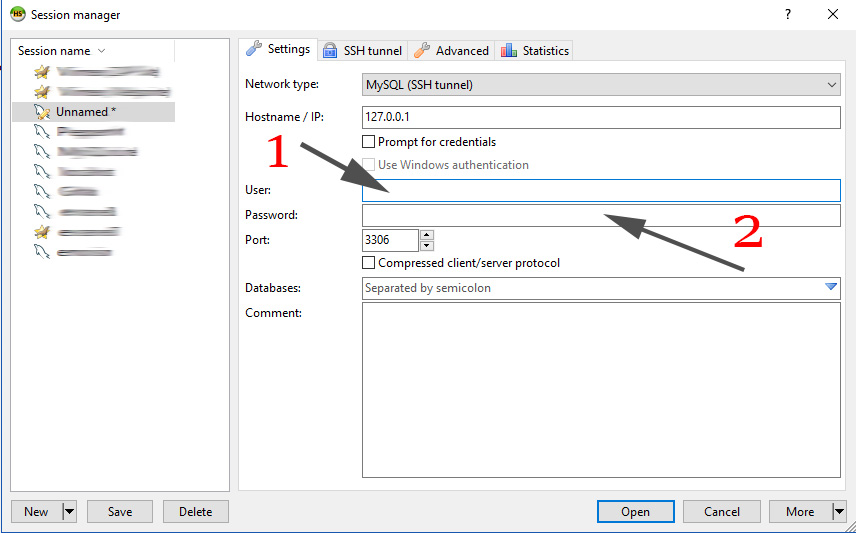
Enter the following details:
- Input the user ID used to connect to your remote MySQL server database.
- Provide the corresponding password for the user.
This section pertains to database connection, while the SSH tunnel tab is for admin access.
Step 3: Adjusting Settings in the SSH Tunnel Tab
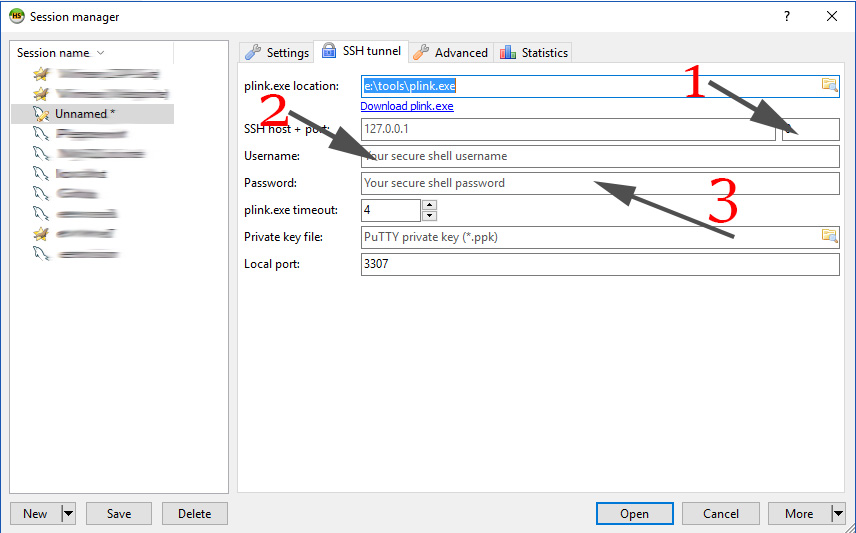
HeidiSQL necessitates plink, a small program assisting with the SSH tunnel connection. Click on the "Download plink.exe" link if you don't have it installed. For the plink.exe location, download the program and store it in a recognizable location.
Include the following details:
- The SSH tunnel access port provided by your provider, such as 7685 (sample: ssh.sample.host:7685).
- The user ID from your provider for backend/admin access.
- The password for the same user.
This step concerns connecting to your hosting admin through SSH and not the database itself.
Step 4: Adjustment in the Advanced Tab

Additional Information
To avoid server disconnections, set the "Ping every X seconds" to 15 seconds or a suitable timeframe for your scenario.
Step 5: Establishing Connection
Save your session, and if successful, you can rely on HeidiSQL and forego PHPMyAdmin, leveraging the conveniences it offers.

Johan van de Merwe
More from same category

|
|

|
|

|
|

|
|

|
|

|
|

|
|

|