How to install Bitnami Gitlab on a VMWare ESX Server and make SMTP mail work
Installing Bitnami Gitlab on an VMWare ESX server
Bitnami is offering a VMWare appliance of Gitlab. This is a server appliance containing a very lite Ubuntu server. You can download the appliance from here.
The appliance is meant for running in a Virtual Box, VMWare workstation or VMWare Player. So to use it as an ESX server you first have to convert it. You can do this with the free VMWare vCenter Converter Standalone Client. You can download that for free from VMWare vCenter Converter Standalone Client download link. The only thing that is required is to make an account (but that is free too).
How to convert the Bitnami Gitlab VMWare appliance
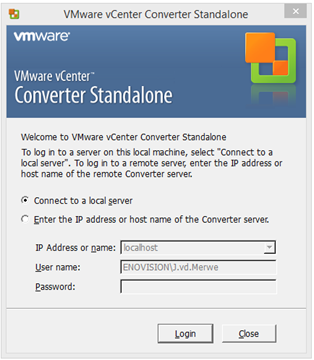
After the installation of the VMWare Converter you start the software and select to connect to a local server (your PC or laptop). You don't require a password here. It is assumed that the untouched but unzipped appliance from Bitnami is on your workstation. You should not have it running in VMWare workstation or VMWare player. If so, shut it down.
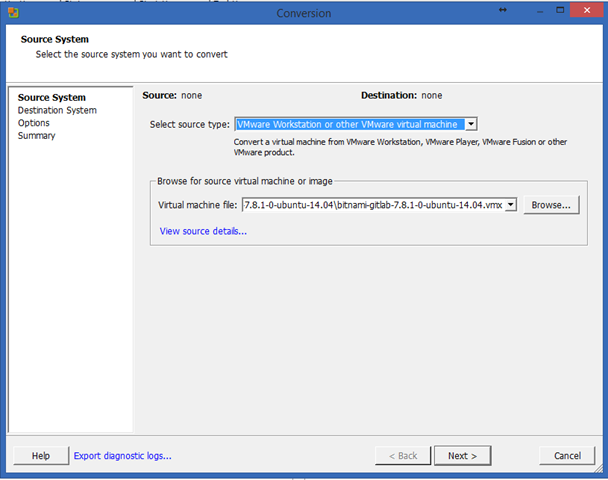
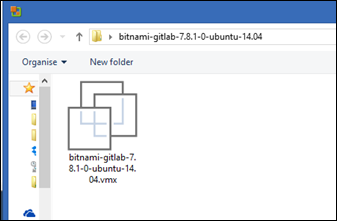
After loggin in you select "Convert machine" from the main menu. In the following display you select "VMWare Workstation or other..." in the source type and click browse to your untouched but unzipped Bitnami Gitlab folder containing the appliance. When doing so it will show only one "vmx" file which you have to select. After that you press "Next>".
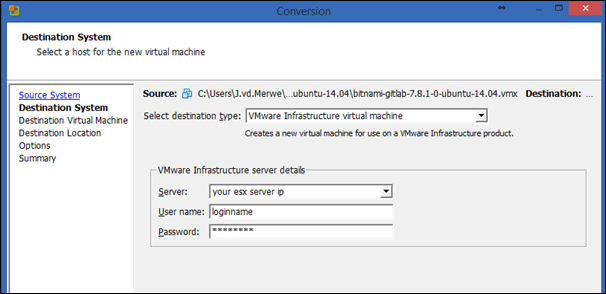
Now you have to give the credentials of your VMWare ESX server. And after doing so press "Next>".
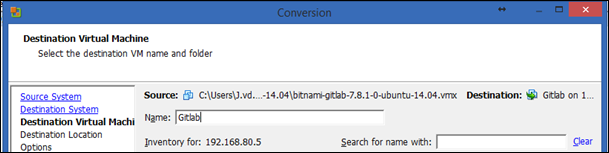
Now give the to be converted a name as it will appear in the inventory of your ESX server. After doing this, press Next>.
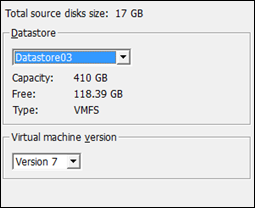
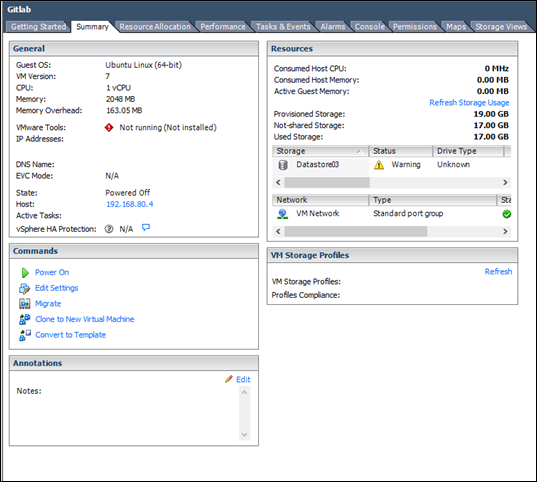
Now you have to select the storage where you would like to put your "Gitlab" server. The server requires about 20Gb of storage in a thin provisioned server appliance.
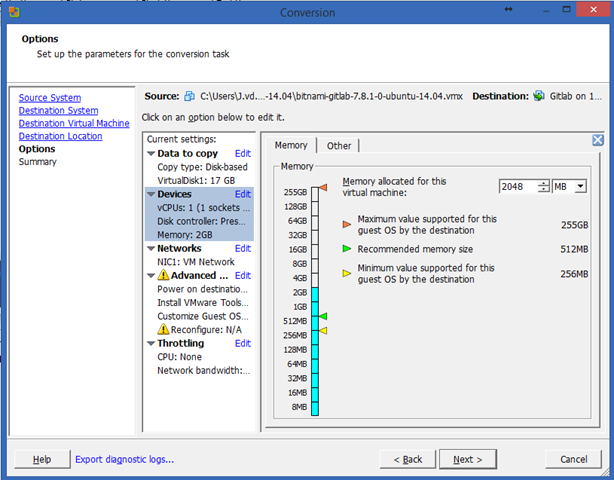
Modify the options of the server to your own liking, but besides the memory that is a bit low (512MB) by default, you don't have to change too much. After you're finished you can press "Next>". An overview is shown with the specifications of the server you are about to create. Just press "Finish" here.
A job will now be submitted and you can see a status slider showing how far it is in the conversion. It will take about 10 minutes or so, depending on your ESX server configuration and bandwidth.
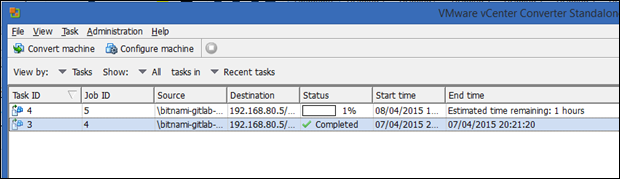
After everything is completed you can use the VMWare client to see your new Gitlab server in the server tree.
Where to go from here?
The Bitnami Gitlab server is a very lite Ubuntu server installation, but it comes with great documentation resources to help you to tune the installation.
What you definitely should do
Install webmin if you are not too convenient with the Linux command line functions (see the Bitnami wiki link below where you can find a good explanation how to install webmin. Keep in mind that webmin might be a security risc if you expose your local gitlab server to the internet. It would be then wise to alter the webmin default port (10000).
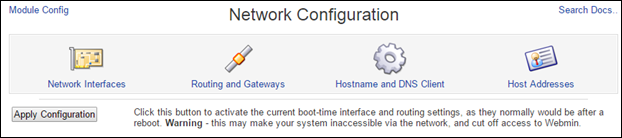
After installing webmin you can easily change the network setttings of your server. By default it is getting an ip address from the DHCP server, but that is not very usefull if you want to add it to your local DNS. You can do this simply by selecting the "Network Configuration" from the menu under "Networking". Make sure that you go through all the settings, otherwise your server might have a new ip address but no access to the internet.
If you don't like the command line of Linux at all you can install a GUI desktop. On the Bitnami wiki page you can see how you can do that, but the recommended Ubuntu desktop is very heavy and not very responsive in a VMWare workstation or client. I have installed the lightweight Lubuntu LXDE.
Installation is easy:
Login to your server and type the following:
apt-get update <enter>
sudo apt-get install lubuntu-desktop <enter>
It will now install the LXDE desktop and after it is finished you should restart the server.

Email settings
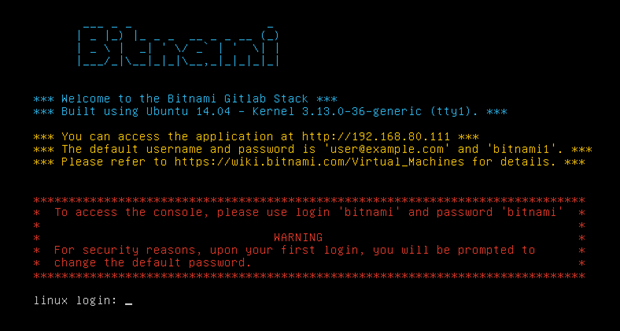
Before you go to the frontend first make sure you have the email working. It took me some time but this is a recipe that will work, that is if you would like to use smtp instead of sendmail.
If your email is not working, a new user will never receive a confirmation mail.
smtp
To use smtp edit the following 2 files:
- /opt/bitnami/apps/gitlab/htdocs/config/gitlab.yml
- /opt/bitnami/apps/gitlab/htdocs/config/environments/production.rb
gitlab.yml
Modify the following to your demand:
## Email settings
# Uncomment and set to false if you need to disable email sending from GitLab (default: true)
email_enabled: true
# Email address used in the "From" field in mails sent by GitLab email_from:
# This must be a valid email address and same domain as used in the production.rb file !!!
git@yourvaliddomain.com
production.rb
Modify the following to your own demand:
# config.action_mailer.delivery_method = :sendmail
# Defaults to:
# # config.action_mailer.sendmail_settings = {
# #   location: '/usr/sbin/sendmail',
# #   arguments: '-i -t'
# # }
# config.action_mailer.perform_deliveries = true
# config.action_mailer.raise_delivery_errors = true

config.action_mailer.raise_delivery_errors = true
config.action_mailer.delivery_method = :smtp
config.action_mailer.perform_deliveries = true

#   :address => "smtp.ziggo.nl",       = external smtp server
#   :port => 587,                      = port of smtp server
#   :domain => "yourvaliddomain.com",  = this is domain of the sender
#   :authentication => :login,         = encrypted
#   :user_name => "someuser@ziggo.nl", = login name for smtp server
#   :password => "Your_P@ssw@rd",      = password for smtp server
#   :enable_starttls_auto => true      = tls when available

config.action_mailer.smtp_settings = {
   :address => "smtp.ziggo.nl",
   :port => 587,
   :domain => "yourvaliddomain.com",
   :authentication => :login,
   :user_name => "someuser@ziggo.nl",
   :password => "Your_P@ssw@rd",
   :enable_starttls_auto => true
}
After you have modified these files you have to restart the Bitnami stack by entering from the Ubuntu terminal:
sudo service bitnami restart <enter>Now your all setup and ready to go. From the admin of Bitnami you can modify passwords and email addresses. Make sure that you also change the default passwords in the Ubuntu environment.
Links (very much recommended)

Johan van de Merwe
More from same category

|
|

|
|

|
|

|
|

|
|

|
|

|
|

|